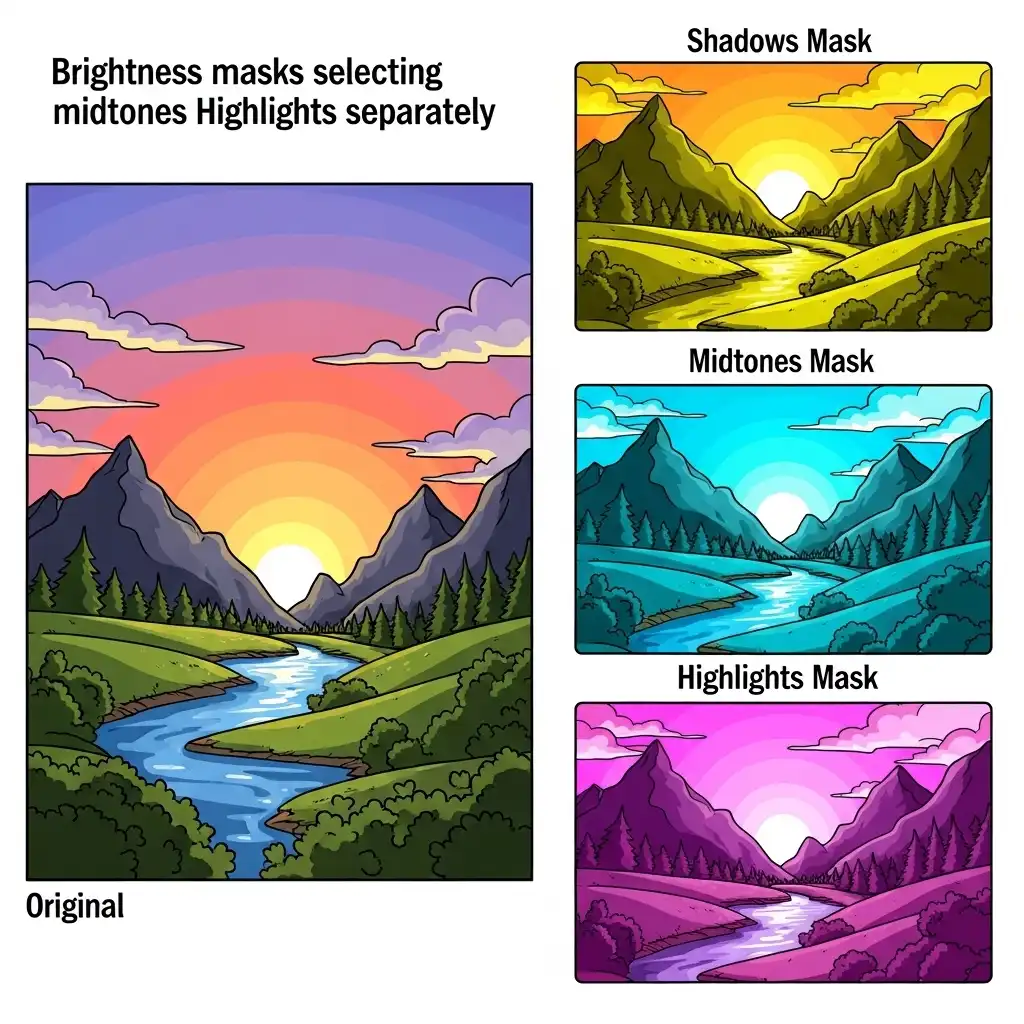
Every photo editor eventually faces the same frustration: you want to brighten only the shadows, but your selection tool draws hard edges that turn into halos; you want to darken only the highlights, but a brush leaves smudges that scream "retouched." The problem is that geometric selections — circles, rectangles, lasso paths — ignore the image's own structure, forcing artificial boundaries onto organic light.
Luminosity masks solve this by building selections from the image itself: they read the actual brightness values of every pixel and generate masks with perfectly feathered transitions that follow the light. In this complete luminosity masks tutorial you will learn what they are, how they differ from regular layer masks, the family of masks every editor needs, a step-by-step workflow for portraits and landscapes, and the mistakes that turn a precision tool into a muddy mess — all practicable in our Photo Editor.
What Luminosity Masks Actually Are (and Why They Changed Photo Editing)
A luminosity mask is a selection derived from your image's own luminance data. Instead of drawing a boundary by hand, you ask the software to select every pixel within a specific brightness range — say, the darkest 10% of the image, or the middle 50% that excludes both shadows and highlights.
The resulting mask has perfectly soft, self-feathering edges because it is built from gradual tonal transitions rather than geometric lines. That is what makes luminosity masks revolutionary: they let you apply adjustments to tonal zones rather than spatial zones, which is exactly how light behaves in the real world. A curves adjustment applied through a luminosity mask affects only the intended tonal range and dissolves invisibly into adjacent tones, producing edits that feel inherent rather than applied.
Luminosity Masks vs Regular Layer Masks: The Decisive Difference
Regular layer masks are spatial: you paint them black, white, or gray to hide or reveal specific areas of the image. They are powerful and flexible, but their boundaries come from your brush, not from the photograph. Luminosity masks are tonal: their boundaries come from the image's own brightness values, so they automatically feather along tonal transitions.
The practical difference shows up immediately in use: a regular mask on a shadow adjustment leaves a hard edge where shadow meets midtone, while a luminosity mask dissolves the adjustment gradually across that transition. Luminosity masks are not replacements for regular masks — they are complements. Regular masks answer "where," luminosity masks answer "which tones," and the professional workflow combines both.
The Family of Luminosity Masks (Lights, Darks, Midtones, and Beyond)
The standard luminosity mask family has three foundational tiers and their refinements. Lights selects the brighter half of the image; Lights 2 selects the brightest quarter; Lights 3 selects the brightest eighth, and so on, each iteration narrower and more specific. Darks follows the same logic downward: Darks selects the darker half, Darks 2 the darkest quarter, Darks 3 the darkest eighth.
Midtones selects the central range, excluding both extremes — perfect for adjustments that should affect neither highlights nor shadows. This family lets you target with surgical precision: Lights 3 might isolate only a bright sky, while Darks 2 isolates deep foreground shadows, leaving everything between untouched. Learn the family, and you have a vocabulary for every tonal situation.
How to Create Luminosity Masks Step by Step
- Open your image in our Photo Editor and complete foundational corrections — white balance, exposure, contrast — because luminosity masks work on corrected data.
- Generate the mask family from your image's luminance channel: most editors offer built-in luminosity mask generators, or you can build them manually through channel calculations.
- Identify which tonal range you want to affect: shadows need a Darks mask, highlights need a Lights mask, midtone color needs a Midtones mask.
- Load the chosen mask as a selection, then create an adjustment layer — curves, levels, color balance — which automatically receives the mask.
- Make your adjustment within that tonal range; the mask ensures it applies only to the intended brightness values and dissolves seamlessly into adjacent tones.
- Refine if needed: intersect two masks (Lights and a color range) to narrow the target further.
- Save the mask configuration as a preset if you use it repeatedly across a series.
Luminosity Masks for Landscapes: The Sky-and-Foreground Solution
Landscapes present a classic problem: bright skies and dark foregrounds, with no single exposure that captures both. Luminosity masks are the professional answer. Start by generating a Lights 2 or Lights 3 mask, which selects only the brightest areas — typically the sky — with perfectly soft edges along clouds and mountain ridges. Apply a curves adjustment through that mask to recover highlight detail or deepen blue without touching the foreground at all.
Then generate a Darks 2 mask for the foreground and apply a separate curves adjustment to open shadows without blowing out the sky. The result is seamless exposure blending that looks like a single perfect capture rather than a composite. Every transition follows the image's own luminance, so no halos, no visible seams, no telltale gradient lines — just natural-looking dynamic range that the sensor alone could not achieve.
Luminosity Masks for Portraits: Dodging, Burning, and Skin
In portrait work, luminosity masks enable surgical dodging and burning that respects skin's natural tonal variation. A Midtones mask lets you apply subtle contrast boosts that affect only the middle range, leaving specular highlights and deep shadows untouched — ideal for adding dimension without flattening the face. A Lights 3 mask isolates catchlights and facial highlights for precise brightening without overexposing surrounding skin.
A Darks mask targets only the deepest shadows under the jaw, in eye sockets, or along the nose, allowing you to burn them subtly without affecting midtone skin. Because every mask feathers along the skin's natural tonal transitions, the result is sculpted dimensionality that reads as light, not as retouching. This is the technique behind magazine-quality portraits that look naturally dimensional rather than processed.
Common Luminosity Mask Mistakes (and How to Fix Them)
- Applying the adjustment before generating the mask, so the adjustment hits the whole image and the mask arrives too late.
- Using overly broad masks — Lights instead of Lights 3 — which affects too much of the image and reduces precision.
- Stacking too many luminosity-masked adjustments without checking the cumulative effect, producing muddy contrast or posterized tones.
- Forgetting that luminosity masks are tonal, not spatial: if you need to limit an adjustment to the left half of the frame, combine a luminosity mask with a regular gradient mask through intersection.
- And judging the effect only at 100% zoom, where the feathering looks soft, instead of at viewing distance, where it reads correctly.
The fix for every mistake is the same: use narrower mask iterations, check the cumulative stack, and combine tonal with spatial masks when needed.
Frequently Asked Questions
What are luminosity masks in simple terms?
How do luminosity masks differ from regular layer masks?
How do I create luminosity masks?
Can I use luminosity masks in a free online photo editor?
When should I use luminosity masks instead of regular masks?
The Takeaway
Luminosity masks transform tonal editing from guesswork into precision: selections built from your image's own brightness data, with self-feathering edges that follow the light. Master the Lights, Darks, and Midtones family, apply them through adjustment layers rather than direct edits, narrow the iteration to match your target range, and combine with regular masks when spatial control is also needed.
Key Takeaways:
- Luminosity masks are tonal, regular masks are spatial.
- Narrower iterations (Lights 3 vs Lights) give more precision.
- Landscapes use them for seamless exposure blending, portraits for natural dodging and burning.
- The best luminosity-masked edit is the one the viewer feels as light rather than sees as manipulation.
- Build your first mask in our Photo Editor — your files never leave your browser.